HubSpot is an extensive CRM and allows you to connect to it via various authentication methods. API Keys is one of the ways to authenticate yourself to gain read and write access to all the data on your HubSpot account.
In the previous part of this article, we discussed the aspects of HubSpot’s announcement of the discontinuation of API keys from the platform and the inability of API keys to work from November 30, 2022.
In this article, we will look into creating custom objects and authenticating them using private apps that are the preferred authentication method after API keys. Along with that, we will demonstrate how to migrate from API keys to private apps using two examples.
What Are Private Apps?
HubSpot allows three authentication methods for the objects, such as API Keys, OAuth, and Private apps. In other words, if we consider HubSpot as a computer, then there are three methods to authenticate an object as its user to utilize the functionalities offered by it. In a similar way, HubSpot allows authentication via three ways to access the HubSpot functionalities.
However, API keys are not going to function from November 30, 2022, and HubSpot has already discontinued the creation of new API keys from July 15, 2022. This leaves us OAuth and Private apps. OAuth is out of the scope of this article, but you can study it on HubSpot documentation.
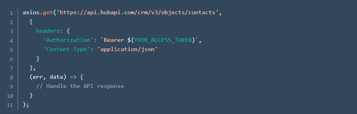
Private apps are access tokens used for authentication. These hold the static access token in the Authorization HTTP header and require the creation of a separate authentication key for each of the integrations.
Setting Up Authentication Using Private Apps
Now that you know what private apps and custom objects are, let's take a look at the step-by-step process of creating private apps. The steps are:
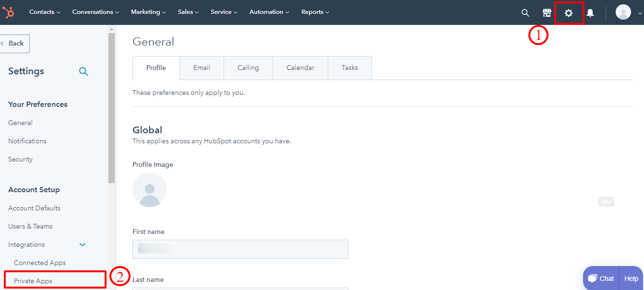
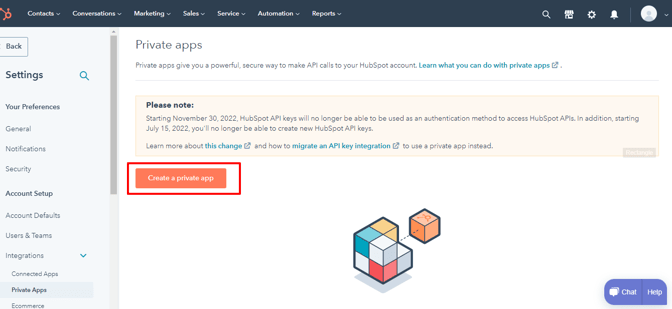
- Login to your account and click on the gear (⛭) icon in the title bar next to the bell icon.
- From the sidebar, click on Private Apps under the Integrations in Account Setup.
- Click on Create a private app.
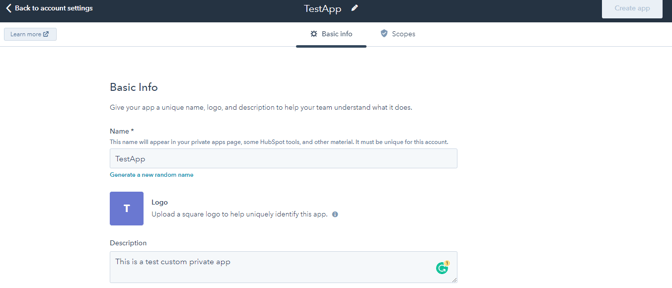
- It will take you to the app creation page. Enter the name and description of your private app and navigate to the Scopes tab.
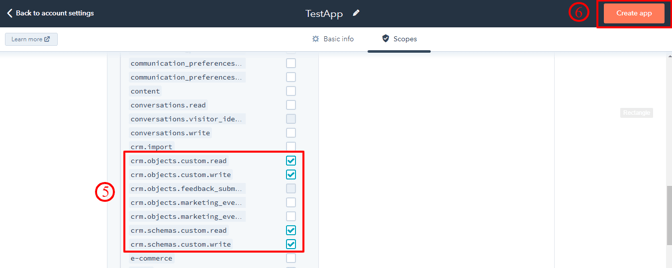
- Under the dropdown of Standards, scroll down to find the fields of crm.objects.custom.write, crm.objects.custom.read, crm.schemas.custom.write, and crm.schemas.custom.read. Mark them checked.
- Click on Create app.
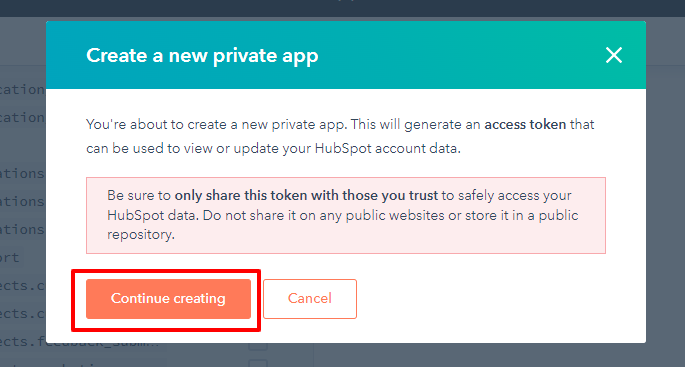
- When the prompt appears, click on Continue creating.
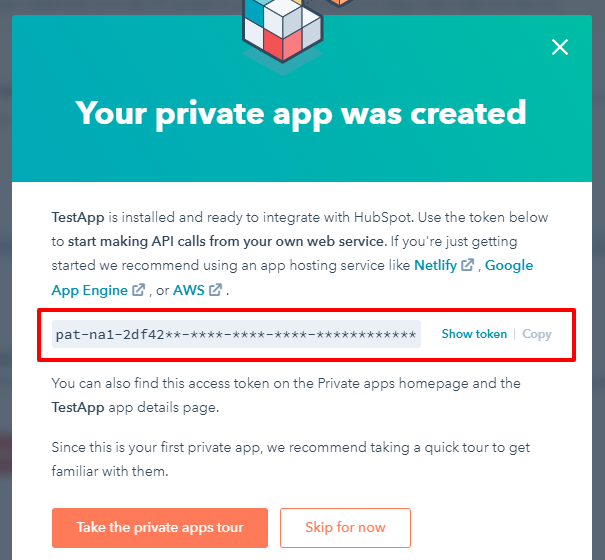
- Your app is created. Copy the access token as you will require it later for authentication.
Example 1: Creating Custom Objects from Private Apps
This section will define the steps of creating custom objects from private apps instead of API keys. We will be covering the steps with the help of an example for better understanding.
You have created your private app in the previous section. Now, you need to call the API endpoint for the creation of a custom object. We will be using Postman for this purpose as the tool allows you to make API calls without setting up your application.
What are Custom Objects?
Custom objects are the additional data objects you can create to ensure that it aligns with your data requirements. HubSpot allows you to add any sort of object with the required fields for storing data.
The steps are as follows:
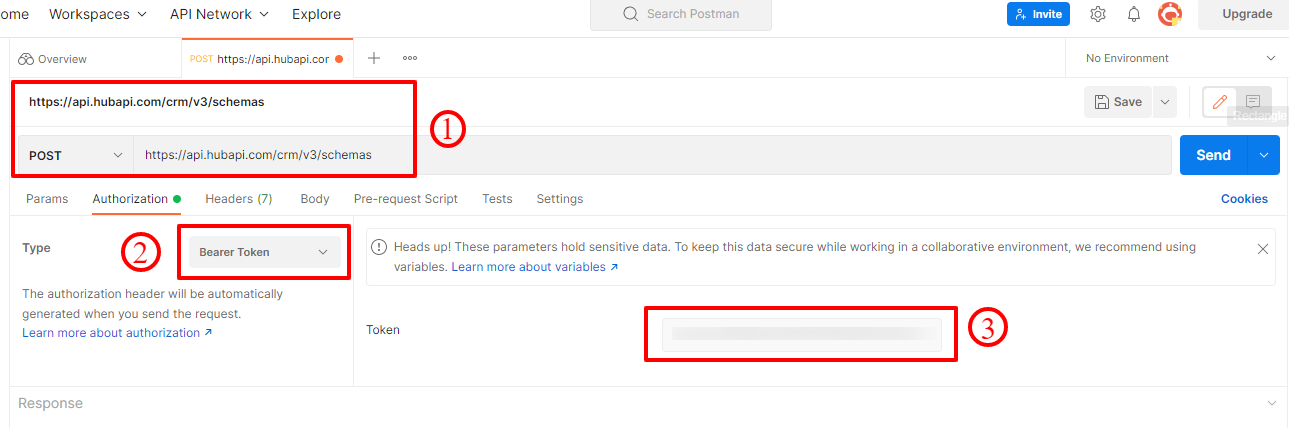
- Navigate to Postman and select POST and in URL, enter: https://api.hubapi.com/crm/v3/schemas
- Under the Authorization tab, select the authorization Type as Bearer Token.
- Enter your token in the input field.
- Create a custom object schema. You can study the fields of the custom objects on this link.
Let’s consider an example where you need to create a custom object for “Cars”. Now decide the items mentioned below for the custom object (These are just the basic items, however, you should finalize other fields mentioned in the list too, before creation)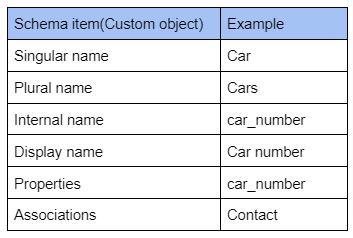
Create a JSON schema based on the list. For our example object “car” it would look like
- Under the body, select raw and data type as JSON.
- Paste your object’s schema below.
- Click Send. Upon successful creation, the status code of 201 will be shown.
- Once the object is created, it will be visible in the dropdown of Contacts in your HubSpot account.


Example 2: Migrating From the Usage of API Keys in Custom Code Workflow Action to Private Apps
In this section, we will discuss how to migrate your custom code workflow actions that are currently working on API keys to private apps. The steps are as follows:
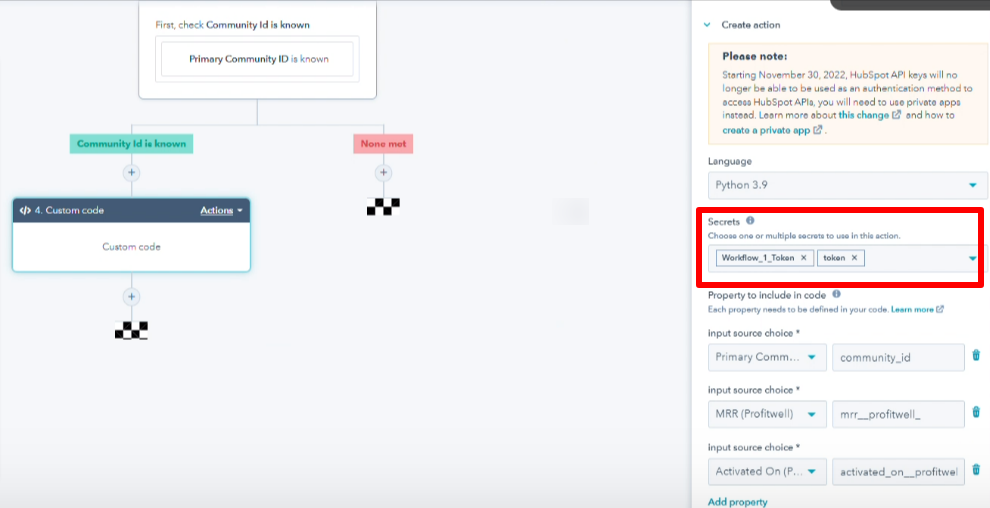
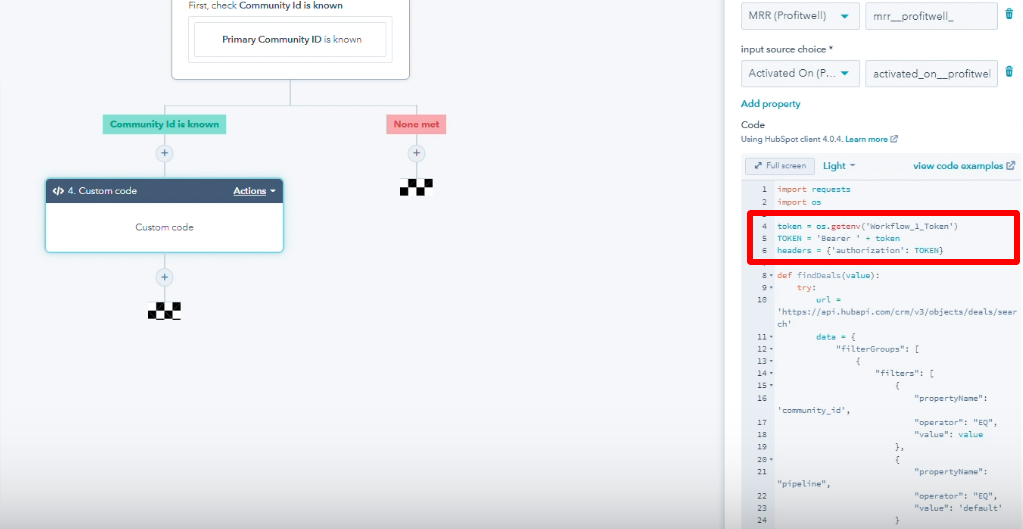
- Open the HubSpot workflow and click on the particular component that holds custom code.
- Click on Custom code from the sidebar that opens.
- Under the Secrets, add the authentication token of the private app instead of the API key.
- Change the authentication option in the Code as well.
- That’s all, it's done.

Bringing Things Together
Private apps instill more security into the infrastructure in comparison to the API keys as they allow you to control the scope and a separate token is created for each of the integrations.
This article covered the steps of creating custom objects using private apps with an example. Along with that, we also looked into the steps of migrating the custom code workflows from the usage of API keys to that of private apps.
The discontinuation of API keys is soon approaching. If you still feel that you need further assistance, Learner.ai is here to help by ensuring a smooth migration process from API keys to private apps.
Eager to learn more? Book a free consultation.